Showing posts with label Vegetables. Show all posts

Thursday, May 17, 2012

Veggie Garden in May

My little veggie garden is rolling along, and I've got most things planted out now. May is a time for harvesting GREEN things in my area:

Lettuce 'Australian Yellow'

Lettuce 'Deer Tongue'


Lettuces: 'Australian Yellow' has a nice crisp ruffly texture, and brightens up the garden with its spring green color.


'Deer Tongue' is my favorite for flavor - chewy, succulent texture and a sweet nutty flavor (almost like mache).


Bed of baby brassicas
My brassica bed is filled with baby greens which I use for stir-fry, soups, and salads: senposai, baby bok choi, and mustard greens. There are some teeny little green onions in there too, which are barely visible in the picture.

Spinach 'Tyee'
My spring-planted spinach bed is now maturing, and I've removed the overwintered fall-planted spinach to replace it with beans for summer. 'Tyee' is my favorite spinach cultivar of the ones I've tried - nice juicy thick leaves, and holds relatively well into the summer.

Arugula


I'm the only one in my family who likes arugula, so this is all for me! I'm totally addicted to the spicy, nutty flavor, but it's definitely one of those veggies that is capable of inspiring both intense love and hate. This planting is getting a bit over-mature, so I'll cook it to soften it up.

Try this:
-cooked pasta
-barely blanched arugula
-lots of parmesan cheese
-a few chopped prunes (yes, prunes)
-olive oil

YUM!


Pea 'Karina' flowering


The peas are flowering, so hopefully any day now we will be in pea-eating heaven - my daughter's favorite garden snack. 'Karina' is a new English (shelly) pea I'm trying this year - supposed to keep producing later in the summer than most peas. That would sure be awesome, if it were true!

Tuesday, April 10, 2012

Seed Starting

I start many vegetable and flower plants from seed indoors. Indoor seed starting is easy to do, saves money over buying transplants, and it also allows me to start "gardening" in late winter, when I can't wait to start playing with dirt again! The picture below shows one of my flats with coleus, amaranth, cutting celery, convulvus tricolor, Thai and Genovese basil, tomatoes, and parsley from this spring.
Seedlings growing in Jiffy-7's and fiber pots
Containers

There are many different types of containers and growing media that can be used for seed starting. Debates over which method is best can get heated, but in my experience as long as you have enough light, water, and the correct temperature, plants will grow quite happily in pretty much any container and growing medium. I personally like to use Jiffy-7's to start my seeds, because I find that they save me time. Jiffy-7's are small discs of compressed peat, encased in a small mesh bag. You soak the peat discs in warm water for about 30 minutes, and they expand into small cylinders. I like these little guys because:
  1. It's difficult to mess up the watering with peat. Peat is a very absorbent material that will hold a lot of water, while also allowing plenty of oxygen between the fibers. Despite the fact that the peat cylinders are tiny, you can water only once a week or so. The containers will not dry up suddenly without warning, and there is also little chance of the roots drowning due to overwatering.
  2. The plants' roots grow right through the mesh bags. If you use a container with hard, impermeable sides (like plastic), when the roots reach the edge of the container they will begin to circle, which is not good (they will continue growing along this circular trajectory even when freed from their container). You can prevent this by being super-vigilant and transplanting to a larger container before it happens (totally unrealistic for me!), or by scoring the roots after you take them out (can get to be a lot of work). With a root-permeable container this is not an issue. The roots of the plants all grow into each other, and some roots will inevitably be torn when you remove one from the flat. This is perfectly fine - a bit of root pruning encourages new growth.
  3. No need to fill with potting soil. Just plant right into the cylinders. Eliminating the soil filling step saves an amazing amount of time when you're planting a lot of containers.
  4. Transplanting is quick and easy. Just pop the entire container right into the garden soil. Planting out a large flat goes very quickly when you don't have to remove each plant from its individual container.
Marigold seedling with roots growing through container
You can also achieve great results by planting in large open flats with no divisions, or using homemade newspaper pots or individual peat pots filled with potting soil. But these options will mean a bit more work.
 
Lighting

Vegetable and most annual flower seedlings need at least 11 hours of bright, direct sunlight a day. It is impossible to get the necessary amount of light with even a bright south-facing window. Without supplemental lighting your seedlings will be leggy and weak. I have a simple setup with LED grow lights and metal grid shelving. Fluorescent grow lights can also be used. Fluorescents are cheaper to buy initially, but use more energy and are thus more expensive to run than LEDs. (I'm not sure which one ends up being cheaper in the long run, but both work.) Fluorescents get very hot, so must be kept further from the plants than LEDs. The LEDs emit a weird-looking purple glow (my neighbors must think I'm doing some kind of mad scientist), but the plants seem to like them. You want to position your plants so they will receive as much natural light as possible, in addition to your artificial lighting. I have mine in my sunniest window, and also keep the lights on for 11 hours per day.
Seedling flats growing under LED lights

Transplanting

Once the roots start growing out through the sides of the containers, it's time to either transplant out into the garden or into a larger pot. I use fiber pots which are also root permeable for this (see first picture above right), filled with any kind of potting mix amended with organic fertilizer. Before your plants go into the garden, they need to be hardened off so they get accustomed to the bright light and buffeting winds of the outside world. I harden off opportunistically - as soon as the seeds have germinated, any sunny afternoon above 50 F they spend a few hours on my deck. I always bring them in at night. Because they've spent so much time outdoors from a young age, my seedlings don't really need a strict "hardening off" schedule before going out.
Seedlings transplanted into garden - early April
I transplant tomato and pepper seedlings out early using Kozy Coats (the red thingies), but broccoli, lettuce, snapdragons, and parsley can go out unprotected rather early. For basil, marigolds, zinnias, cucumber, and squash wait until the danger of frost has passed. Peas, spinach, radish, carrots, beets, and beans are better direct seeded.

Lettuce 'Deer Tongue'
Before you know it, you'll be harvesting yummy veggies and enjoying an early flower display!

Marigold 'Favorite Red' with Basil

Monday, March 12, 2012

Garden Visitors

My previous community garden plot was adjacent to a prairie restoration field, with a small forest and lake nearby. As you can imagine, humans were not the only creatures to inhabit this space. Here are some fellows I got to know over the years. Some I really miss, and some not so much - I think you'll be able to tell which is which!

Sandhill cranes
A pair of sandhill cranes nested on the lakeshore every summer. They took a stroll in the field every afternoon. I would say hi to them from my plot as I worked in the garden. Once as I was bent over weeding, they flew right over me, so close they almost touched me. I felt a sudden wind rushing over me and stood up, only to be confronted with a crane rear-end in the air in front of my face!


Occasionally they would sneak through the gardens in search of a tasty tidbit. Sandhill cranes are supposed to be rather shy, but this pair seemed quite unconcerned at the close presence of humans.

Sandhill cranes with chick
Sandhill cranes have one chick per year. Here they are showing this year's baby around the neighborhood.

Ground squirrel watching me: "Plant some more of those peas, lady! We like 'em!"
 Here are two more friends I met on the plains. Both are small, tailless, and really like to eat. Ground squirrels would pop cheerfully out of their tunnels and stare intently as I surveyed the damage they had done. They would mostly just eat vegetables reachable from the ground, but I've also seen one climb a pea fence to get to the peas on top. They would always come to watch me work - many little heads in a circle around me, thinking: ooh, next we are going to eat THAT!
Vole peeping from his hidey-hole
Voles tunnel underground and are very shy. They eat the roots of plants away to nothing from underground. Usually all I saw of the voles themselves was a gray-brown streak as they scurried away if I disturbed the pile of mulch they had been hiding in. But they left behind plenty of mementos...
Rodent damage on 'Tetsukaboto' winter squash
I'm not sure who was at this feast - perhaps they had a giant rodent party? I can just see them, sucking the juice from some fermented tomatoes and shouting "Gardens RUUUULE!" So that you don't feel too bad for me, I would like to say here that I harvested a bounty of vegetables from this garden. Losses to rodent damage really never exceeded 10 or 15%. I just looked on it as the local rodent tax - not a bad rate, compared to some other tax codes I know!

Red-tailed hawk
Fortunately for gardeners, where there are rodents, there are predators. I find these large hawks somewhat terrifying (they always seemed to be sizing me up - could we eat her? she does look kinda wimpy...), but I know deep in my heart that they are good for my garden so I try to like them. Also, they are strikingly beautiful. But I still don't want to pet them.

My current garden is in more of a suburban-y landscape, and the visitors tend more toward the conventional marauding bunnies, chipmunks, and bird-seed fattened gray squirrels. I see cranes flying far overhead now, but we still receive plenty of visits from these guys:
Hawk with bunny fluff on my neighbor's lawn

Friday, March 9, 2012

Overwintering Spinach

I just picked my first spinach harvest yesterday, March 8. Yes that's right - I'm in Wisconsin, zone 5a, there was snow on the ground just last week, and I'm already harvesting spinach! I used my bounty to make a healthy "Green soup" (which, by the way, is my 5-year old's favorite soup).

Early March spinach harvest ('Tyee')
 This is possible because the spinach was planted last fall, and I overwintered it using a coldframe. Spinach is incredibly hardy - it can withstand temperatures well below freezing. If grown in a coldframe you can harvest spinach far into the winter (late December here), long after snow has blanketed the earth. Eventually, if your winters are as cold as mine are, the plants will freeze. But that's OK. As soon as spring arrives, they will thaw out and resume growing instantly, just as if nothing had happened. They are only temporarily frozen in time, like characters in a bad science fiction comedy. You can start picking right away, and the quality of the frost-sweetened leaves is excellent. I grow 'Tyee' which is a particularly cold-hardy variety.

Overwintered spinach growing in coldframe. Time to wake up guys!
I have a fairly flimsy-looking coldframe/mini-greenhouse that I purchased last year. It's made of plastic cloth attached to wires with handy zipper openings. I'm not sure how long it will last, but it spent all winter outside and did quite well - no rips, tears, or other visible damage yet. It got flattened to the ground several times under heavy snow and ice, but the flexible wires bounced it right back into shape as soon as the snow melted. Eventually I'd like to make a "real" coldframe, constructed of wood and glass, which should be sturdier and offer better winter protection.
My coldframe/mini-greenhouse
This fall I plan to try overwintering more types of cold hardy greens - mache, tahtsai, kale, and perhaps collards. I'm not sure if they'll all bounce back as easily as spinach does, but I should be able to extend the harvest by a month or more into winter at least.

Wednesday, February 29, 2012

Growing Tomatoes with Kozy Coats

Heirloom tomato harvest, including 'Anna Russian', 'Oxheart Pink', 'Black Brandywine', 'Yellow Brandywine', 'Crimson Cushion', 'Black Prince'
I've been experimenting with growing tomatoes using Kozy Coats (which are very similar to Wall-o-Waters). That's those weird-looking plastic cones made of tubes filled with water. (The only difference between Kozy Coats and Wall-o-Waters is that the KCs are red and the W-o-Ws are green.)
Kozy Coats with tomato plants inside, late April
 The basic idea is that you can put your tomato transplants out earlier than normal inside the Kozy Coats, which should result in an earlier harvest. The tubes of water heat up during the day, then give off warmth at night. Also, the shape of the structure itself protects plants from cold winds and traps warm air inside. It works like a little mini-greenhouse/cloche for each tomato. The company claims that you can set your plants out when the ground is still frozen, by setting up the Kozy Coat a couple weeks early to thaw the soil. I've never tried to go quite THAT early, but I have planted tomatoes as early as April 5 (where our "normal" tomato planting time is about May 20). In April and early May we definitely still get freezing temps at night here, and plenty of cold days as well.

Tomato growing inside Kozy Koat, late April
So the question is, does it work? Short answer: yes. I definitely get earlier harvests this way. More complicated question: is it worth it?  Answer: it depends...

Tomato plants in June
Using Kozy Coats requires quite a bit of extra work, and a certain amount of peril (mostly to the plants, although the gardener is in significant danger of getting SOAKING wet when trying to fill the blasted things). Putting plants in the ground six weeks earlier gives me tomatoes in hand only about two weeks earlier than normal. Is two more weeks of tomatoes worth the work and risk? Only you can decide...

Things that can/will go wrong:
  • Disease and death - Light is transmitted through the colored plastic, and air does circulate a little through the top, but both air circulation and light transmission are diminished. If you hit a long stretch of particularly gray, damp weather, your tomatoes may get diseased, grow poorly (resulting in no earlier harvest), or even die. In six years of growing tomatoes using Kozy Coats I've lost only one plant. But success is definitely better in years when spring days are bright and sunny. Cold nights, however, really do not seem to be an issue at all, nor does snow.
  • Sunburn - When temps warm up, you need to remove the Kozy Coats, or the tomatoes can actually fry in there. This needs to be handled delicately, and you have the same potential problems you do with hardening plants off. Just popping the protection off suddenly, especially on a bright day, will cause the leaves to get sunburned and perhaps fall off. Ideally you want to take them off for a few hours each day, putting them back on at night, and extending the fresh-air time gradually. (I am much too lazy to follow my own advice here, and no plant has ever died of sunburn for me, but they look pretty awful when they first come out.)
  • Cold wet gardener - Filling the tubes with water is probably a 3-person job at least (which I always do by myself, since my husband and daughter magically disappear when non-fun tasks arise). The Kozy Coats stand up well once all the tubes are filled, but it's like trying to hold up a heavy mass of drunken jello until then. It's not physically possible to hold open the tube for filling without getting extremely wet, even if you miraculously manage not to topple any onto your feet. And remember, it's now 4-6 weeks before you're tomatoes want to be outside, so prepare to be very, VERY cold.
  • Limited choice - If you buy your tomato transplants, you will find at best limited availability of varieties so early in the season. In early days before I got into seed starting, I ended up buying varieties I was not particularly interested in (even - shudder - HYBRIDS!) because that was all I could find for sale in April. So the bad news is you'll just have to begin your heirloom tomato seed starting mania, if you've somehow managed to escape it so far :-)
  • Your neighbors will look at you real funny. But we're all used to that, right?
So am I willing to risk all of this just for two measly extra weeks of tomatoes? YOU BET I AM! And if you have eaten one of these guys plucked straight from the vine, you surely understand why.
Tomato 'Brandywine'

Thursday, February 16, 2012

Asian Greens


I love Asian greens - and they taste best when picked fresh from the garden, of course!

Mustard greens, Bok choi, and Tah tsai
Asian greens are quite easy to grow from seed. Just plant in early spring (for a spring-summer crop) or late summer (for a fall crop), when the weather is cool. They do not generally appreciate hot weather. In my climate, floating row cover is essential to protect plants from flea beetles, which will otherwise chew thousands of tiny holes in the plants, and possibly even kill them. The row cover is light- and water-permeable, and is placed directly over the plants like a blanket. Anchor the edges with logs, stones, or earth. If you take good care of it (which I do not!) it will last several seasons. (I once tried to wash an old, soiled row cover in the washing machine and I can tell you that this does not work! The row cover gets strip-like tears and is ruined.) Here are some of my personal favorite Asian greens:


Baby Bok choi 'Shuko'
Baby bok choi (bok choy, pac choi) is delicious and easy to grow. This is not just an immature form of the regular, stringy, tall bok choi with thick white stems. Baby bok choi is a different vegetable. It has green stems and grows to only about 4-6 inches tall at maturity. All parts are sweet and tender. You can either pick the entire plant when mature (the prettiest option), or continuously harvest the outer leaves until it bolts (the most abundant option). Either way it is delicious added to a stir fry or soup. For me bok choi has just the right balance of spicy brassica flavor and sweetness. I have grown a variety of cultivars including 'Feng Qing', 'Mei Qing', 'Shuko', 'Brisk Green', and 'Ching Chang' and have found them to be very similar.

Mustard 'Pink Pop'
Mustard greens are of course a spicier vegetable, and the spiciness can really vary by cultivar and growing conditions. I mostly grow mustard greens for harvesting at the "baby" stages and for adding to salads. Here are two cultivars I've enjoyed: 'Pink Pop' has light green serrated leaves with pretty ruby pink veins. It's a bit course-textured and hairy when mature, but when young it is tender and not too spicy.

Mustard 'Ruby Streaks'
'Ruby Streaks' mustard has very finely dissected leaves and makes a pretty reddish-purple addition to a salad. The flavor is very mild if picked when young.

Tah Tsai
Tah Tsai (Tatsoi) is one of my favorite Asian vegetables of all. This is not a very good picture - it is actually much cuter than this. The color is an extremely dark green, and the shape is flat and round, like a rosette. It has a serious, lurking sort of look to it, as if it is clinging to the earth. I have the feeling it is afraid it will fall upwards. In my climate I can harvest the outer leaves from a plant continuously from spring through fall some years (if it gets too hot the plant will bolt, however). The flavor is excellent - a wonderful deep "green" flavor which is brassica-like, but not too spicy for me. Tah tsai is also tremendously cold-hardy. It can be overwintered in an unheated greenhouse in my climate, just like spinach. (The plants will freeze temporarily when temps dip well below freezing, but will start growing again once it warms up.)

Chinese cabbage 'Blues'
Chinese cabbage (or Napa cabbage) is of course a well-known Asian vegetable. In my climate it does not grow very well, because it needs a long, cool spring (or fall) in order for the heads to form. Our spring and fall here are just too short for this to happen reliably. I tried a variety of cultivars and the most successful for me was 'Blues'. 'Blues' is a hybrid that is rather small, and heads up relatively quickly. It also resists bolting in warmer weather somewhat. Still, only some of the plants would form heads before the onset of high summer. You may have better luck with chinese cabbage if you are have a longer spring than me. It is wonderfully fresh and crisp when eaten straight from the garden and well worth a try.

Amaranth
Amaranth may not come to mind when you think of Asian vegetables, but Amaranth leaves are eaten by many people throughout south and east Asia. The flavor is excellent - warm and nutty. Unlike the other Asian greens, it is not a brassica and has a very different flavor. The best thing about Amaranth is that it is a tropical plant which grows well in the heat of summer. Seed should be sown only when temperatures are warm. It is not troubled by flea beetles. It grows quickly and gets very large (several feet tall and wide). Harvest by pinching off the branch ends, containing the smallest, tenderest leaves and shoots (like harvesting basil). New branching shoots will form. The larger, older leaves are tough and not the best for eating. If you let it, the plant will flower and is quite ornamental.


Chinese cabbage 'Fun Jen
'Fun Jen' is a hybrid Chinese cabbage that does not look like Chinese cabbage at all. It is leafy and does not form a head. The color is a very pleasing bright spring green, and the the leaves are very soft-textured and wavy. I did not have much luck with it because the soft, juicy texture of the leaves proved to be an absolute slug-magnet under my row cover. It got eaten to strips, as you can see here. Also, it bolted very quickly (as shown in the picture). The flavor, for me, was too bland. I personally prefer a brassier brassica. But it is something different to try - if you can stop the slugs.


Kai Lan
Kai lan (Gai lan) is the best-tasting Asian vegetable I have ever eaten. It is reminiscent of very good broccoli, and perhaps somewhat of arugula, but it has a wonderful sweet nuttiness all its own. You eat the stems (peeled, if mature) and the baby flower florets, like broccoli. Sadly, it does not grow well for me. It also needs a long spring for the stems to mature and get thick (the ones in the photo above are laughably tiny if you've seen good examples of Kai lan!). For me they begin to bolt (as above) when the stems are still very thin, and though tasty, there is just not much vegetable to pick. This is one of the few cases where I can purchase better vegetables than I can grow. You should give it a try if you have a long spring, or do like me and visit your local Asian grocery if not!

Monday, February 6, 2012

Pretty Veggies

When I select vegetable varieties to grow, I'm really all about the flavor. I couldn't care less if a vegetable is ugly as sin. However, I do appreciate the charms of the beautiful ones too - especially when I'm perusing my photo collection on a dreary winter day! Here are a few of some of the lovelier veggies I've grown:

Shelly beans 'Vermont Cranberry'
The beans themselves are red-mottled as well, and quite tasty too! These are shelly beans (you don't eat the outside). Excellent over pasta with olive oil.

Winter squash 'Jarrahdale'
 I grew a number of different winter squash varieties, and 'Jarrahdale' (from Australia) was the biggest and loveliest. It was not actually my favorite for flavor (that would be 'Tetsukabuto' - a smallish black-green Japanese variety), but it did make an admirable soup. It's hard to tell the scale from the picture, but these things are pretty huge.

Potato 'Caribe'
 This was my favorite potato, which for some reason is hard to find. It's pretty early, and has crispy, juicy clear white flesh which is perfect for frying (my favorite thing to do to a potato). Smallish-medium sized, but prolific. The skin is a brilliant purple color - always used to make me giggle when harvesting it! It changes to a more appropriate brownish red when cooked. Seed potatoes for this variety have become hard to find for me, sadly!

Cabbage 'Early Jersey Wakefield'
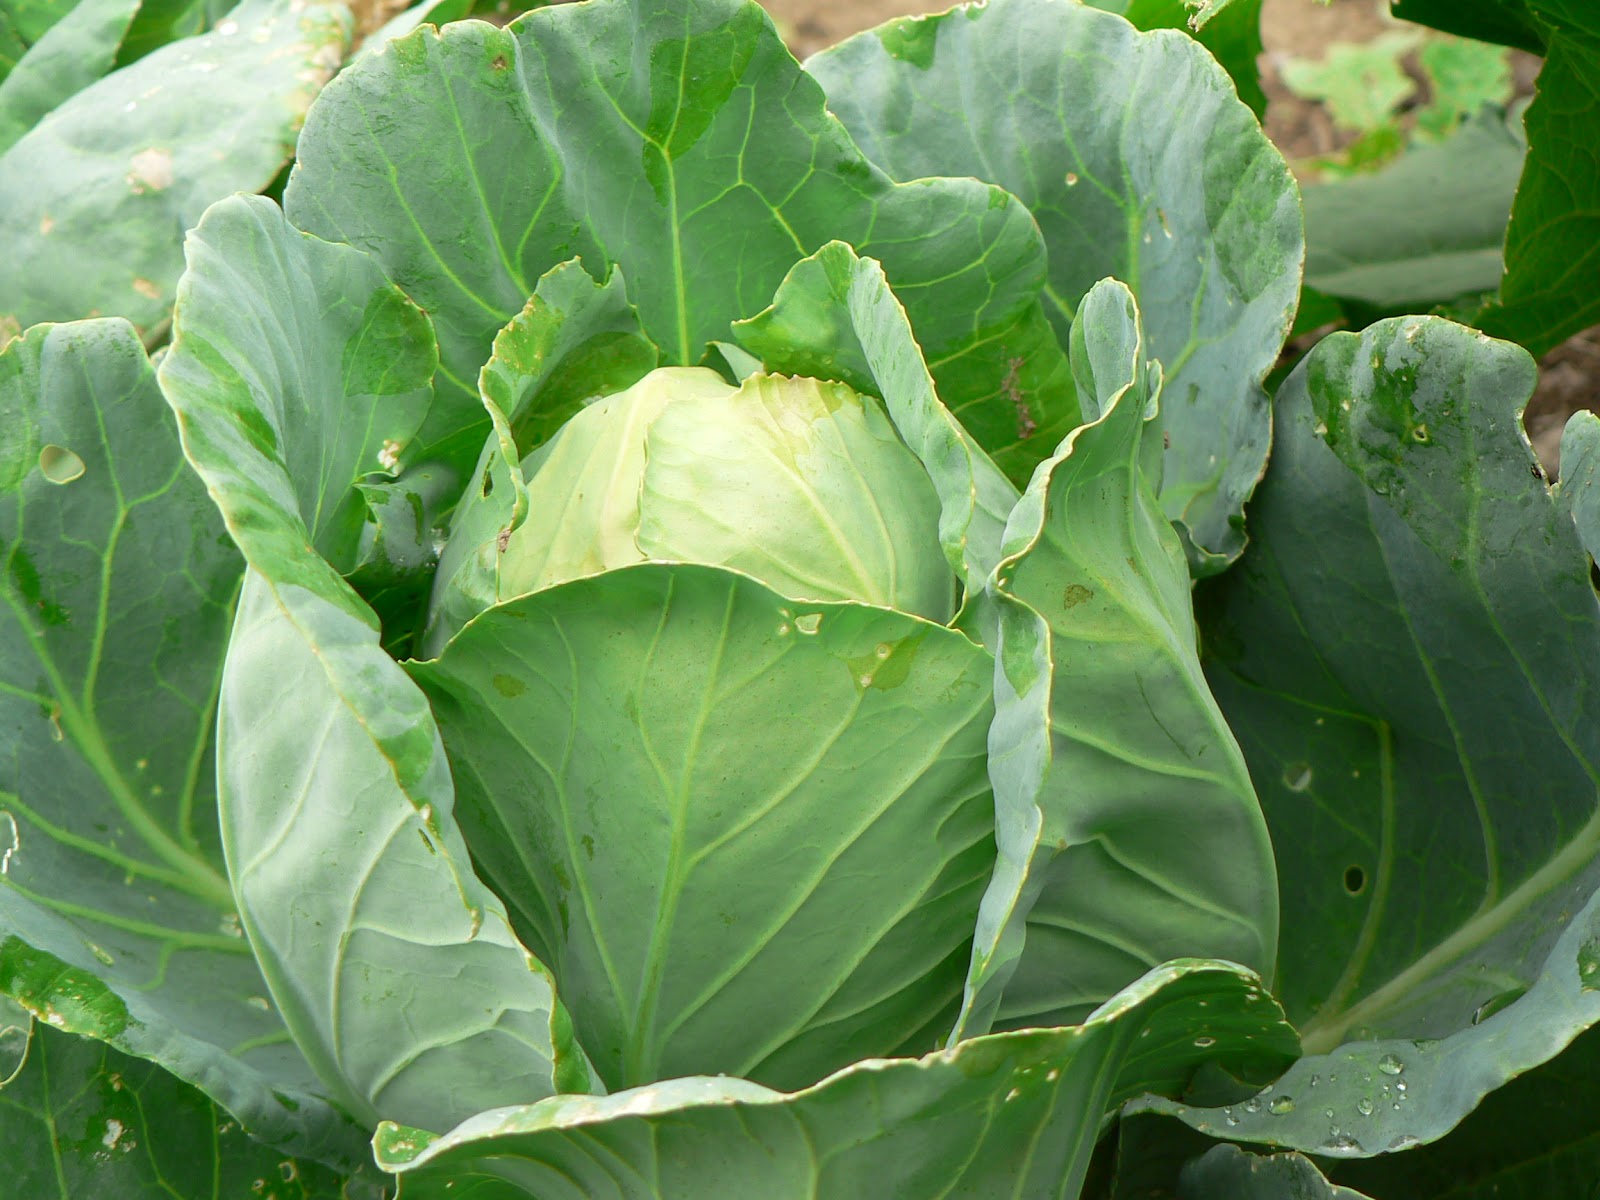
 Okay this is probably weird, but I think cabbages are pretty! It's that blue-green color and the concentric whorls of succulent leaves that get me. This is 'Early Jersey Wakefield', a pointy-head which is easy to grow and has the most decent flavor and texture of any early cabbage I tried. (Most earlies are weak and insipid, and fall apart when cooked.)

Beet 'Cylindra'
 Beets are all pretty with their bloody-red roots and red-veined leaves. I liked 'Cylindra' best because the elongated shape means you get more beet per square foot of ground, and the rodents can't get at them as much. The flavor is excellent - deep, sweet and particularly beety.

Bok Choi 'Mei Qing'
Baby bok choi is pretty as well as delicious (at least, as long as it hasn't been perforated by flea beetles... that's what I need row cover for.) Oyster sauce - yum!

Carrot 'Mokum'
I still feel a kind of happy surprise every time I pull a carrot out of the earth! It's like finding bright orange buried treasure. Edible treasure - the best kind. 'Mokum' is my favorite early carrot for fresh eating - sweet, crunchy, and very carroty (not just sugary). The tops are a little fragile, but I can handle that.

Cutting celery 'Afina'
No, that's really not parsley - it's cutting celery (or herb celery). Again, probably odd of me to find it beautiful, but I just love that swathe of spring green. Cutting celery tastes even more like celery than regular celery, and is much easier to grow. Like parsley or other herbs, it has thin flexible edible stems. (It's widely used in Europe, which is where I first encountered it.) Seed germination can be a bit finicky, and growth is slow at first. I've had the best success sowing in flats inside, then transplanting to the garden.

June vegetable harvest
A harvest basket from one sunny June day, including Savoy cabbage, beets, carrots, lettuce, and parsley. I must have had borscht that day! If you could see the snow outside my window today, you might understand why this photo makes me sigh so wistfully...

Rosalind Creasy's gorgeous book will inspire you to make your veggie plot beautiful (mine really needs work in that area!)
Related Posts Plugin for WordPress, Blogger...